In my first post about Airtable, I introduced you to some of the basics. Here I will give some ideas on ways to incorporate Airtable into your ensemble program that goes beyond just sorting your information.
Organize ALL of your data
In my first post, I mentioned that we keep just about everything in the database at my school. I don’t mean just student information such as instrument, contact information, and t-shirt sizes. I mean everything. Once you start thinking of everything as data that you might want to access, reference, or sort quickly, it becomes obvious that a database is the way to manage it. Let me give you a few examples:
Music Library Management
At my school, keep our music library in a database. Most of the obvious information is in there for each piece of music: Title, Arranger, Publisher, etc. But we also keep other information in there too such as the key signature, the difficulty/grade level, a link to an online recording, the style of the piece (march, overture, ballad, etc.), and a checkmark if the piece is available in SmartMusic. This makes programming much easier; I simply sort or group the database by the criteria I’m thinking about – say a Grade 2 Ballad – and I see what we have. I can quickly click on the links to listen to recordings and see if it suits my needs. While you can do some of this with a spreadsheet, the sorting tools are a little harder to use and things such as key can be stored in drop-down menus. And there’s other benefits…
Keeping Track of Performances
Another thing that we do is keep track of all of our performances in linked table in the same Music Library Database. For each concert or performance, we simply tag the pieces we played in the library using a “Link to Another Record” field. This allows us to see which pieces were played when, and over time will allow us to keep track of how often a piece is played. This is also helpful because with two different concert bands and two jazz bands we can tell which group played which pieces when.
Instrument Inventory
Keeping your instrument inventory in a database is another way to make life easier. This section may be of particular interest for those of you who need to provide data to an administrator about repair money or making a multi-year plan for new instruments.
Beyond just keeping an inventory of all your instrument with makes, models, and serial numbers, take the time to create some statuses such as Status and Condition. We use Status to keep track of which instruments are Ready to Loan, or are Out with Students. Because we keep our Instrument Inventory in a table in the same database as our students we can easily assign instruments using the “Link to Another Record” field. We then have a status for Needs Repair and Our for Repair. By keeping these up to date we can quickly tell at the end of the year which instruments need to go out and why, and then which instruments are still out. Add a note field to this and you can make quick notes of what specifically needs to be repaired, and can quickly create a report to send out with a repair rep.
Speaking of repairs, we also have a Repair History table. Each entry is an individual repair and is linked to the instrument in the Inventory Table. Each repair has the date, price, and description of what was repaired. We also use the attachment field to take a picture of the receipt to keep digital records of the repair tags. Doing this might create exactly the sort of evidence that you need to convince your administrator it’s time for a new bari sax, instead of spending $200-$300 repairing the same things every year on an instrument that was played during the Nixon administration.
Publish Data using “Share Views”
More than likely as a music teacher you’ve had the need to share information with your students, more than likely a paper up on a bulletin board. Maybe it is lesson groupings, or maybe bus assignments for a field trip. If you have read this far you are probably at least considering keeping this information in your database. Instead of printing, or exporting the data to print from another program, you can publish your tables in Airtable.
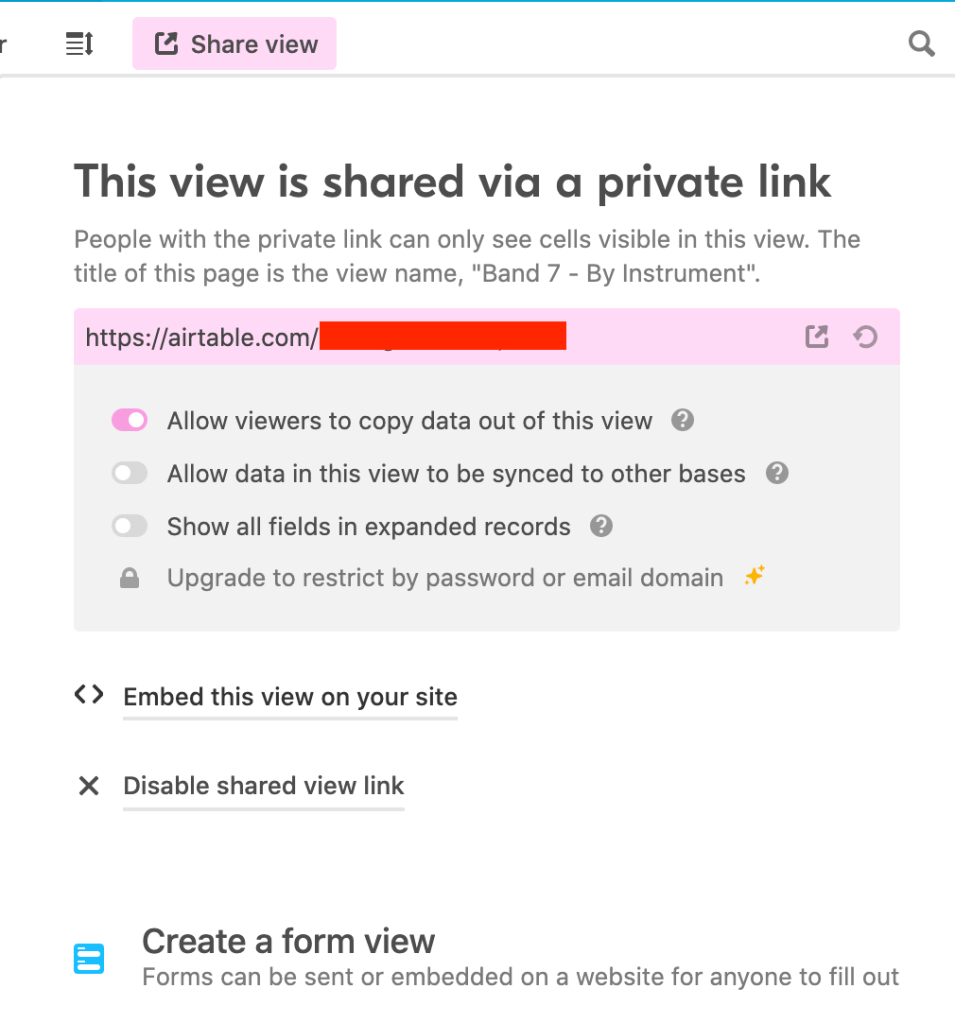
The Share View Menu allows you to share the current view as a webpage, or embed it into an existing web page. When published as a page the view will be given a unique link that can be shared. The other options can be handy, such as allowing (or not allowing) viewers to copy data, or allowing them to see (or not see) other fields. One of my favorite uses of this is to post Lesson Groups for my students. This allows me to hide other information like locker assignments and not allow students to copy the data, but it allows me to always share the most up-to-date information without having to repost this to my LMS resources. Using this approach can save time and the hassle of forgetting to update a page with the latest version of a file.
Use Forms to Collect Data
Another great feature of Airtable is that you can collect data using a form. While this may seem like a pretty standard thing that can be done with Google Forms, the advantage here is that you can directly populate one of your databases. This can great when you are collecting data that is going into a database that already exists – perhaps collecting registrations for a multi-school event.
If you would like to see how using a form to add data works, try using this one. This form links to a (copy of a) database that I use with my students – we call it Sound Role Models. This is a collection of artists and recordings playing the band instruments we teach. We show this to the students so that they can pick a musical role model to emulate as far as the sound of their instrument. To give more ownership (Danielson Box 4 territory!), students can directly share an artist they know if one is not already listed. Try adding one yourself and check out the results – using the Share View we learned about before.
| Submit an Entry: https://airtable.com/shrMspdnAhD6AMpNE | See The Results: https://airtable.com/shrlH28oTXcje0zFx |
Obviously, you’ll want to monitor this just like anything else students have access to. Thankfully it can email you whenever there is a result – perfect for knowing when to check results!
These are just some of the ways that I use Airtable to make my life easier. In my personal life, I use it for simple things like Christmas Cards lists. I also use it for more complicated things like gigs (including travel milage and expenses) and private student info such as lesson dates, contact info, and what material is covered. You will know how best to incorporate these tips into your own life. I encourage you to get a handle on your data and be organized.
